|
|
Summary
The eValid Image Difference Utility, eVimagediff, provides
a capability of comparing two images, masking the comparisons, and
producing differences.
Recording to Save A Image
With eValid's exceptional recording capabilities, nearly any task done through
eValid shrinks a user workload dramatically! Saving backup images from a site by
saving it locally can reduce the workload for a user by automating such task.
And, when used in conjunction with the eV.generate feature, one can create a
script which periodically downloads and saves it under a new filename every time
-- automatically!
As you will observe, eValid waits for the time specified and runs the script, saving the image to the local folder specified.
Comparing Two Images
The eVimagediff window's utility allows you to compare captured bitmap images.
During your recording session screen area images, windows, full screens
which you have saved as bitmaps files can be loaded and compared by
selecting a baseline and response file from the provided menu/submenu
and its responding window pop up options. By applying the Difference
menu's Do Diff option, if the images match, then the eVimagediff window
should be white; if the images do not match, then the eVimagediff window
will display those bitmap differences.
The eVimagediff utility allows you to compare what are the differences that
were found during your playback session. As expected images captured
during your recording session and actual captured areas during your
playback session should be identical. If they are not, your playback
test session fails. You can use the eVimagediff window to see if there are
any differences.
Constructing Image Masks
eVimagediff has a masking feature which allows you to eliminate/mask out
areas of an image so as to eliminate expected
differences. You can enable this feature by rubberbanding around the
area(s) to be excluded from your image comparison during playback.
Command Line Interface
eVimagediff [basefile] [responsefile]
Example
The frames below present an example of how the image difference utility works.
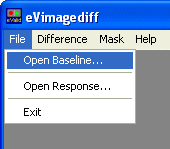
| From the menu, use File > Open Baseline and File > Open Response to select the bitmaps you want to compare. |
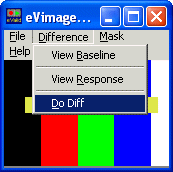
| Select Difference > Do Diff to make the comparison. |
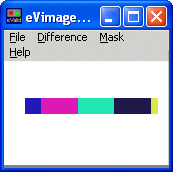
| Non-white areas are those that differ between the two bitmaps. |
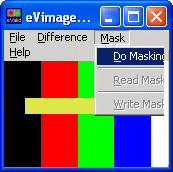
| You can fine-tune your comparison from the use of image masks. |
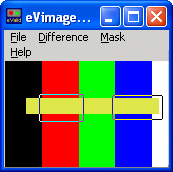
| With Image Masking enabled, draw rectangular boundaries on the areas of the image you do not want compared. |
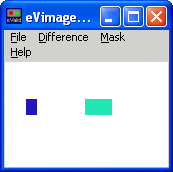
| This shows the above result with the two masks on the areas of the image applied during the comparison. |