|
|
This page aims to give you a Quick Start in using the eV.Manager.
We've added helpful hints in key places on this page.
When you see this hint image (
 ), position your mouse over the
symbol to get additional information.
|
1. Launching eV.Manager
2. The PullDown Menus 3. Creating a new EVM file 4. Adding and Removing Tests |
5. Selecting Tests to Run
6. Running Your Test(s) 7. Viewing Files 8. Getting Help |
|
eValid Home | |
![]() Click the eV.Manager icon on your screen to launch eV.Manager.
The display consists of a mini-Web browser on the right and two empty panes on the left.
The mini-Web browser displays eV.Manager reports created as HTML pages; the two empty panes on the left will contain a test tree and selected tests to be run.
Click the eV.Manager icon on your screen to launch eV.Manager.
The display consists of a mini-Web browser on the right and two empty panes on the left.
The mini-Web browser displays eV.Manager reports created as HTML pages; the two empty panes on the left will contain a test tree and selected tests to be run.
Because eV.Manager has to be able to call upon eValid
to run playbacks of tests upon which it will report,
in addition to having its own V9 license,
eV.Manager requires eValid with a valid license key.
 License Info to view your license key.
If you have an EVAL license, you must be live
on the web for this class of license.
eV.Manager cannot interact with eValid running on a DEMO
license key.
Less restrictive licenses are avaliable;
Contact eValid using the Information Request Form for details.

|
Click eV.Manager to pull down the main eV.Manager functions. The picture at the left shows the options on the eV.Manager menu. Actions you can take are in solid letters, like eV.Manager > Settings > Preferences in the sample. Conditional actions are shaded out; they change into solid letters when they are available functions for you to use. For example, it makes sense that you wouldn't expect to use the eV.Manager > Playback > Stop unless you are running a test. Additional information on the pulldown menus can be obtained here in the GUI manual. |

eV.Manager uses a spreadsheet-like editor to add and remove eValid scripts
from your test suite. The editor is accessed from the pulldown menu
eV.Manager > View > EVM File
or from clicking on the ![]() icon.
icon.
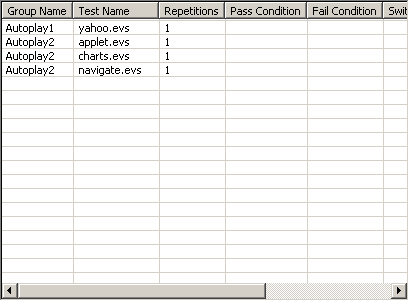
|
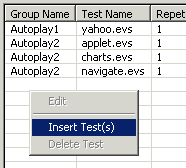
Insert a test by right mouse-clicking anywhere in the editor and select Insert Test(s). |

|
Enter the name of the group. The group is a folder below the project folder which contains the test script. Press the TAB key to edit the next item. |
|
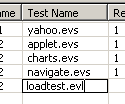
Enter the name of the script file here. It must contain an .evs or .evl extension to denote an eValid script file or an eValid LoadTest script file. Press the TAB key to edit the next item. |

|
Enter the number of times you want this test to run. Press the TAB key to edit the next item. |
The rest of the fields are optional. Information on these fields can be found here in the GUI manual.
|
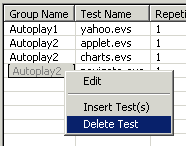
Removing a test is as easy as right mouse-click on a test item and selecting Delete Test. |
|
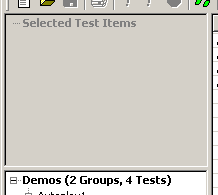
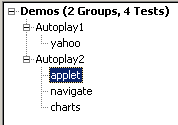
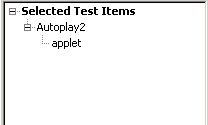
You need to tell eV.Manager which tests to run in your test suite. These tests are listed under the Selected Test Items tree. |
|
|
| When you select a test item (like applet on the figure above) from the Master Test Tree . . . | . . . the selected item appears in the Selected Test Items tree |
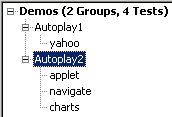
|
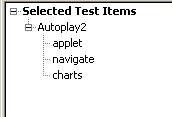
|
| When you select a test group (like Autoplay2 on the figure above) from the Master Test Tree . . . | . . . the selected item appears in the Selected Test Items tree |
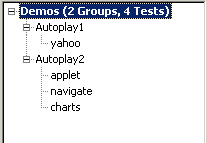
|
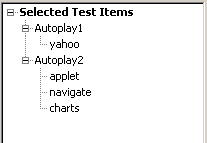
|
| When you click on the project name (like Demos on the figure above) from the Master Test Tree . . . |
. . . every test item in the project appears in the Selected Test Items
tree

|
To remove a test item from the Selected Test Items tree, simply left mouse-click on the test item. You can also click on the test group or the main root of the tree to remove an entire test group, or to clear the entire tree, respectively.
After you have selected the test(s) you want to run click on eV.Manager > Playback > Run Selected Test(s) and eV.Manager will run the test(s) once. If you want to run the tests several times, click on eV.Manager > Playback > Run Multiple.

|
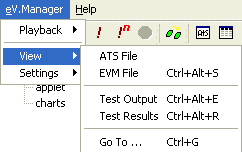
It may help you to view the EVM file -- and other eV.Manager files -- to see what eV.Manager has reported. Click eV.Manager > View > Test Output to view eValid messages returned from a running test. Under the eV.Manager > View menu you can view the the ATS File that displays a C-style source of the test plan, EVM File where you can view and edit your test plan, and Test Results where test summary and regression reports are written. |
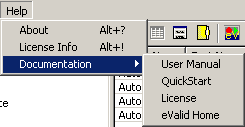
There are many ways to get help with the usage of eV.Manager. Click on Help > Documentation to get to access to any of these kinds of information:
